Get your vario in time for Christmas: order now before Thursday 12 December 12:00
Menu
miniBip V2: detailed user guide
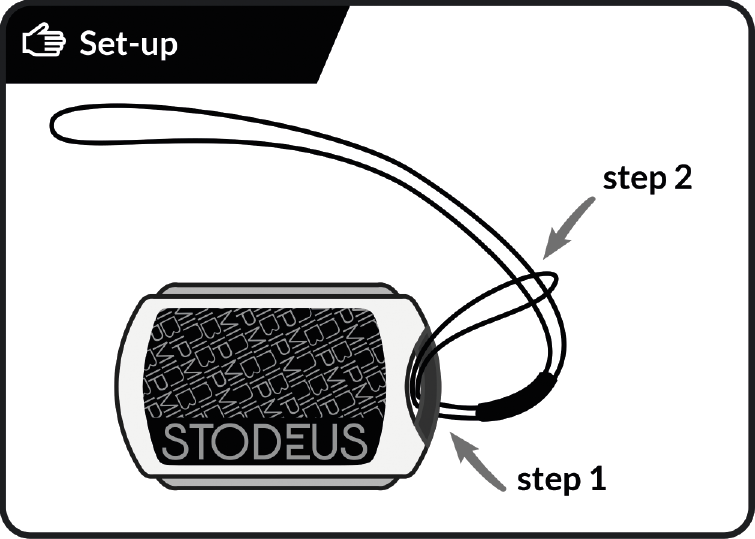
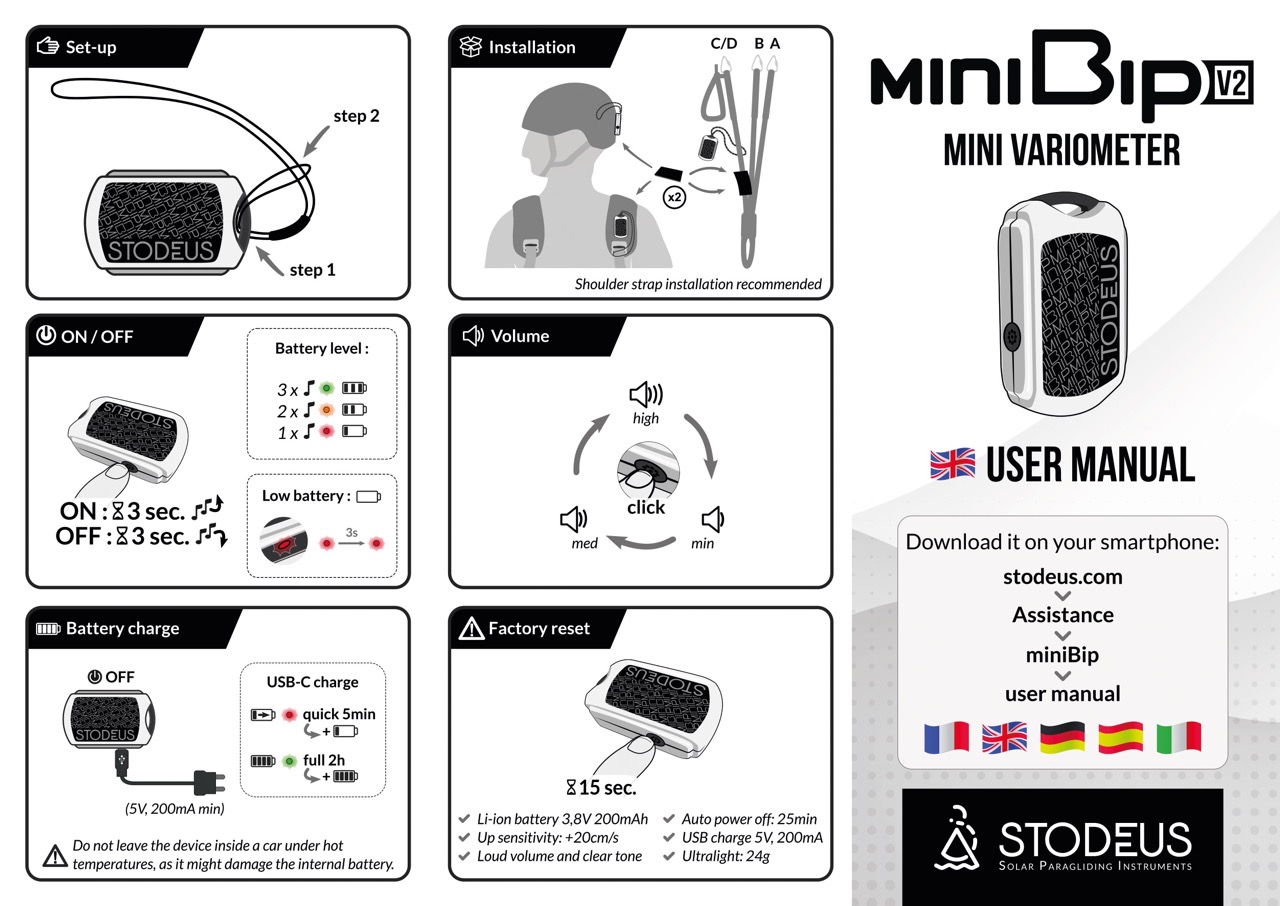
Set-up: Make a lark's head with the attachment line to secure the miniBip V2.
Pass the small loop of the attachment line through the handle of the miniBip V2.
Pass the other end of the line (large loop) inside the small loop.
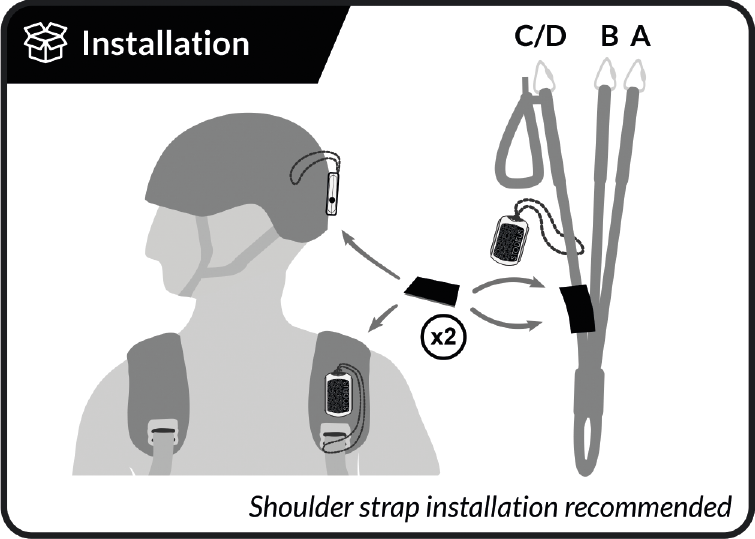
Installation: 2 Velcro loops patches are supplied with the miniBip V2 to attach it to your equipment. You can glue one Velcro to the back of your helmet, and if necessary, glue/seal the second to the shoulder strap of your harness, or use the two Velcro loops glued together around the riser.
Note: Installation on the harness shoulder strap is recommended. On the helmet, make sure you always place the miniBip V2 on the back of the helmet, not on the side, to avoid inconsistent beeps due to variations in the relative wind (for example when the pilot turns his head).
ON : To switch on your miniBip V2, hold down the button for 3 seconds. You'll hear the start-up melody, followed by the battery level.
3 beeps + green LED: battery 100%.
2 beeps + orange LED: 50% battery.
1 beep + red LED: battery 10%.
OFF : To switch off your miniBip V2, hold down the button for 3 seconds and you will hear the switch-off melody.
Note: If the LED flashes red every 3 seconds, the battery is empty and the miniBip V2 needs recharging.
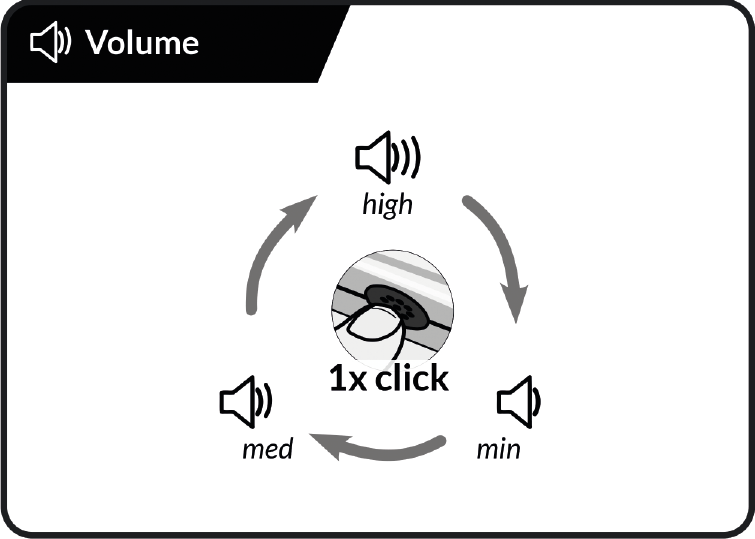
Volume: At any time, in flight or on the ground, you can select from three different volumes at the click of a button:
minimum
medium
high
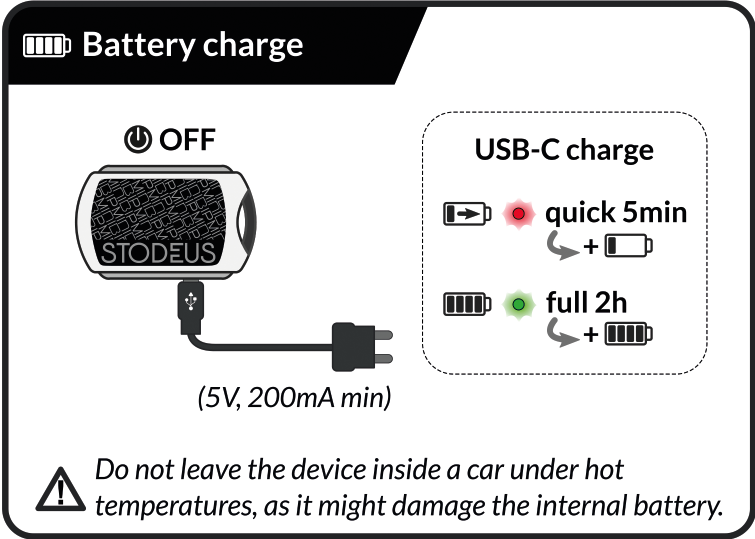
Charge : When the battery level is low (10%), the LED flashes red. This indicates that you need to recharge the miniBip V2.
To recharge the miniBip V2, it must be switched off. Use a USB-C cable and a mains charger (5V, 200mA minimum). The LED glows red, then turns a steady green when charging is complete.
Note: Be careful not to leave the miniBip V2 in a car at high temperatures, as this will damage the battery.
You can find Stodeus USB-C cables in our online shop, Accessories category.
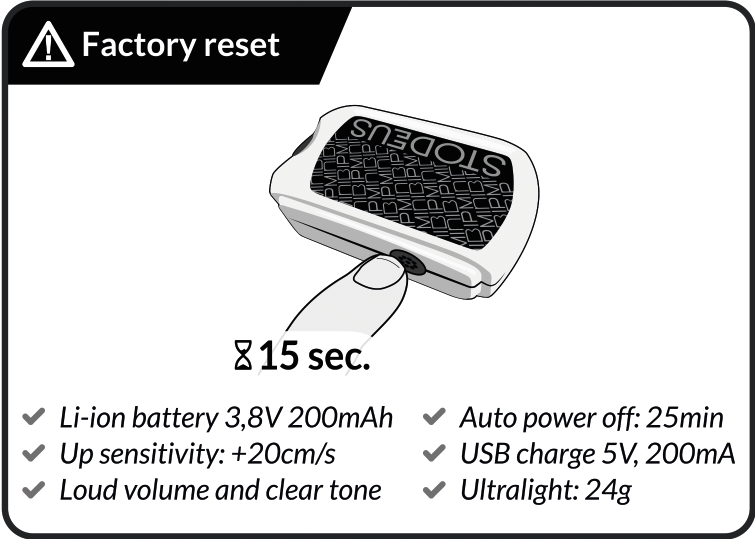
Reset : If you need to, you can perform a factory reset at any time by pressing and holding the button for around 15 seconds.
Download the printable version of the user guide here