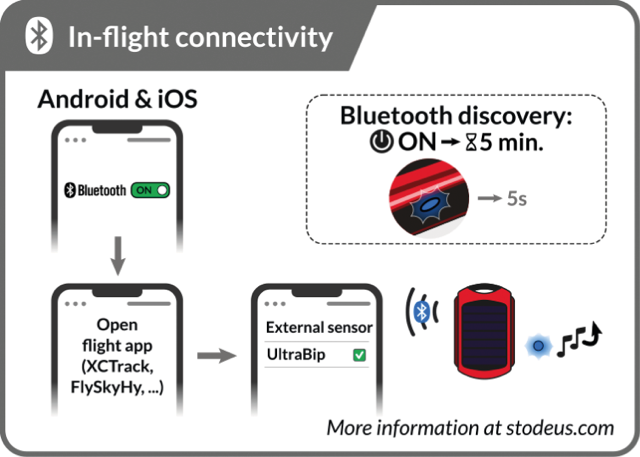


To establish the connection between the UltraBip and your flight app, there is no need to pair the UltraBip to your smartphone in the Bluetooth menu.
Yes! UltraBip can be connected via Bluetooth to Android and iOS smartphones and tablets!
Data transfer to the in-flight app cannot be done via USB, as Bluetooth is more energy-efficient. What's more, Bluetooth offers a more reliable connection than using a physical connection that could deteriorate. This method also leaves the phone's USB port free for a powerbank.
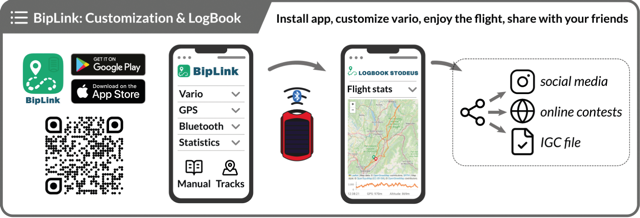
Yes, as long as you have activated track recording in theBipLink app.
We invite you to consult the following two pages:
- GPS and altitudes
- Bluetooth connectivity, see the "Protocols" section at the bottom of the page.
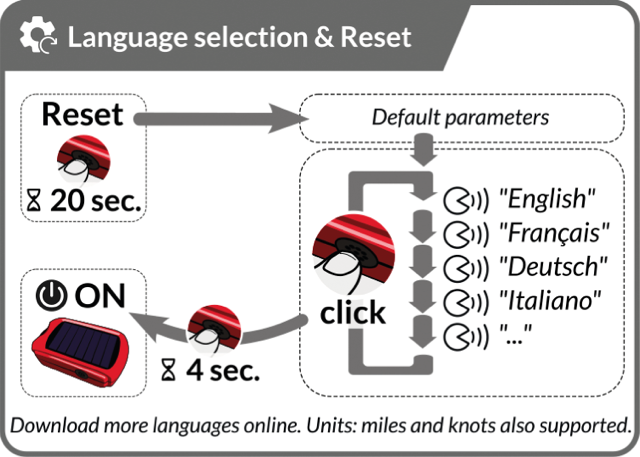
Click here to go to the voice pack download page.
There must always be at least one language pack in the "voices" folder.
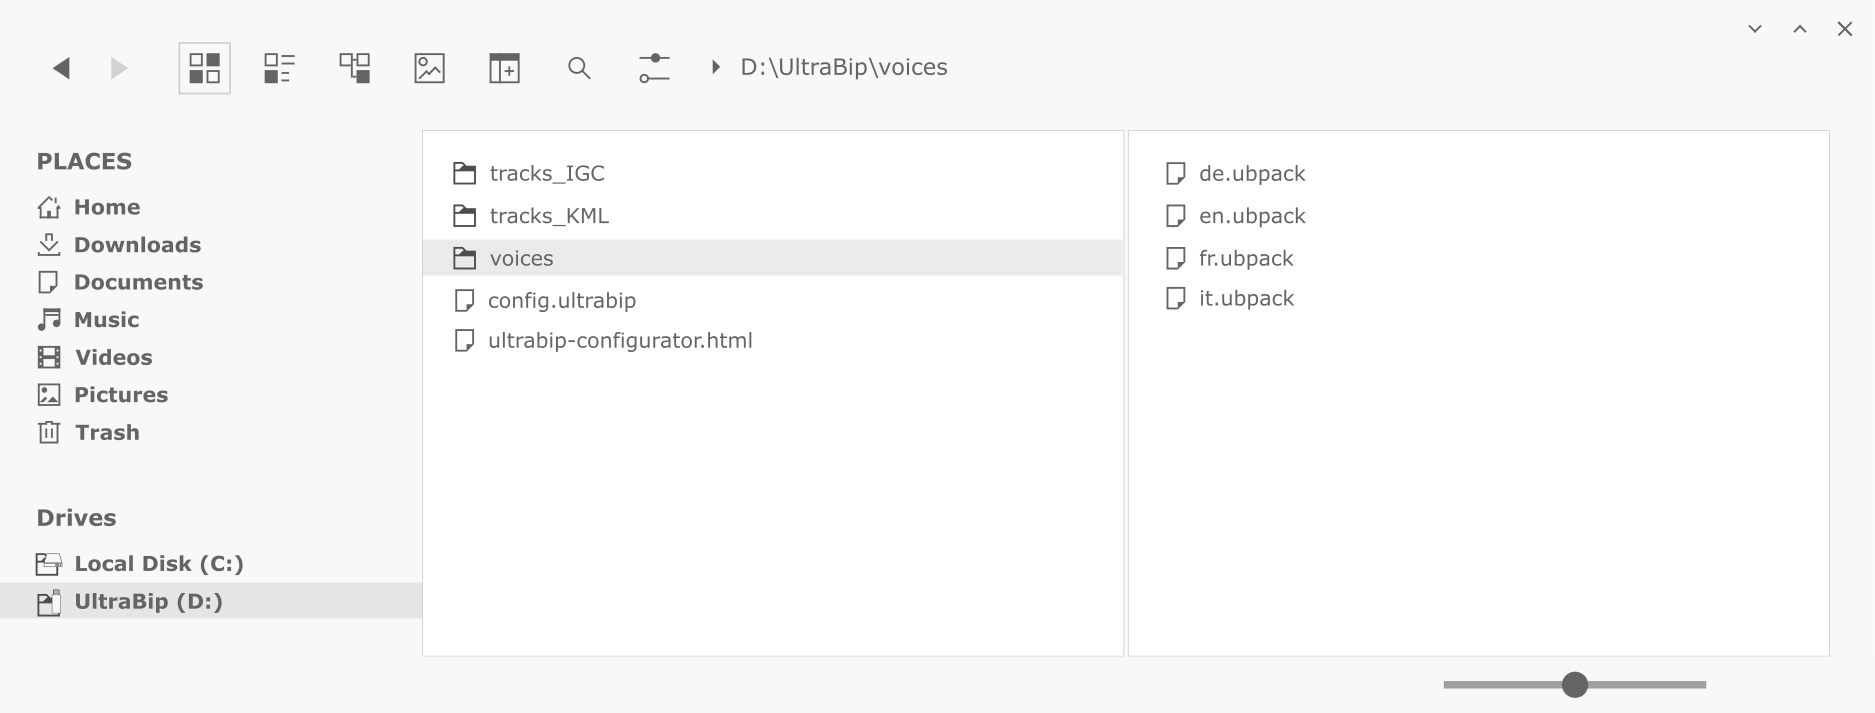
When you plug the UltraBip into your computer, it appears as a USB stick in your file explorer or finder.
Its root tree should look like this: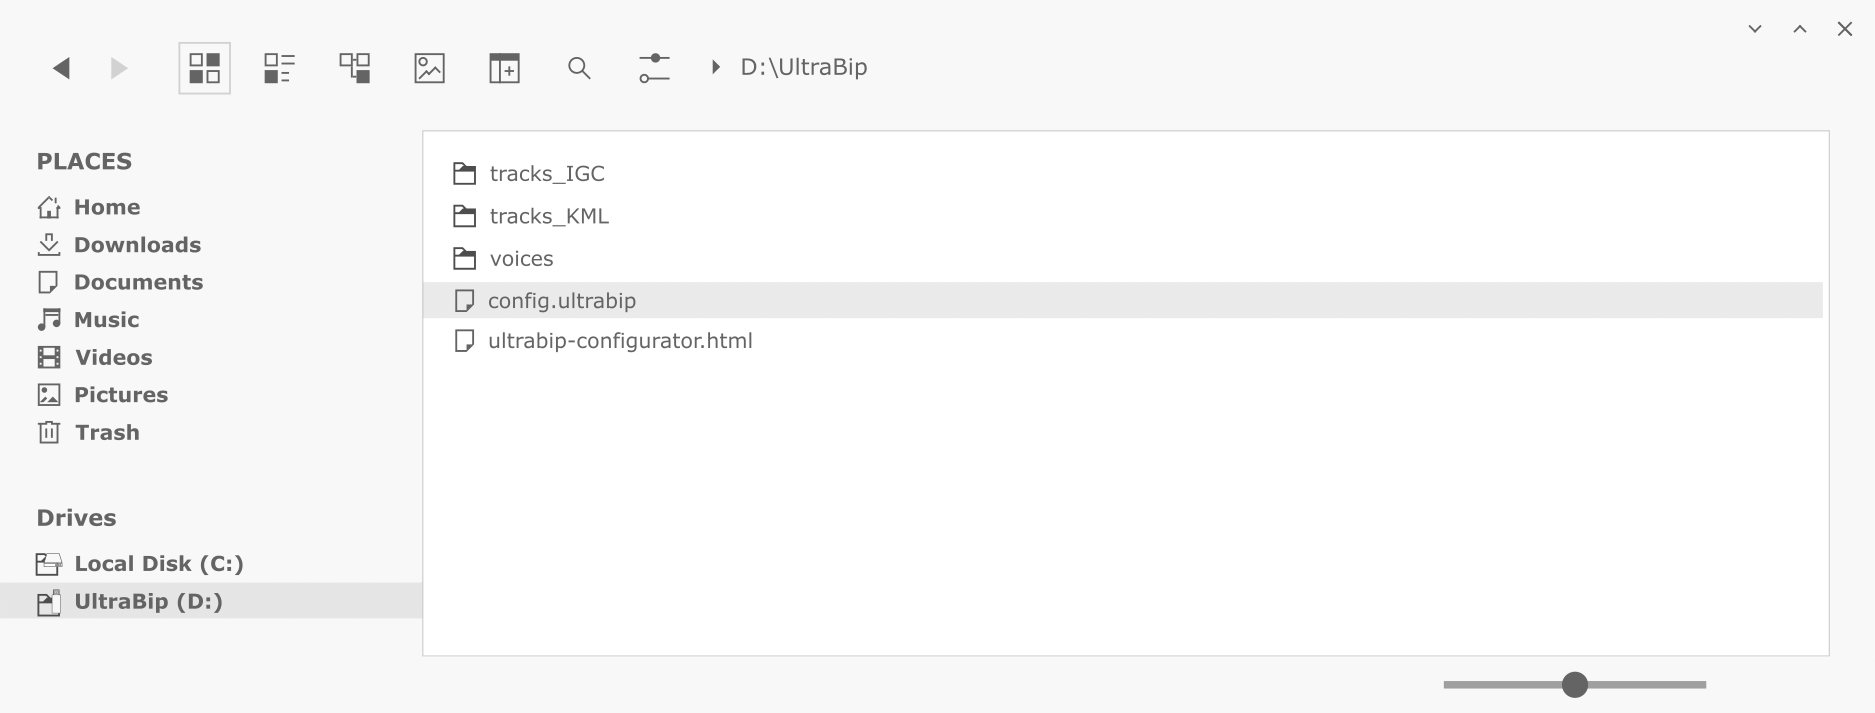
The "voices" folder must always contain at least one language pack. You can delete language packs that you are not using.
The "tracks_IGC" and "tracks_KML" folders contain the tracks recorded. They are classified as follows. The "ON_GROUND" KML sub-folder contains the same KML tracks, but with all the recorded points stuck to the ground. Useful for tracks made on foot.
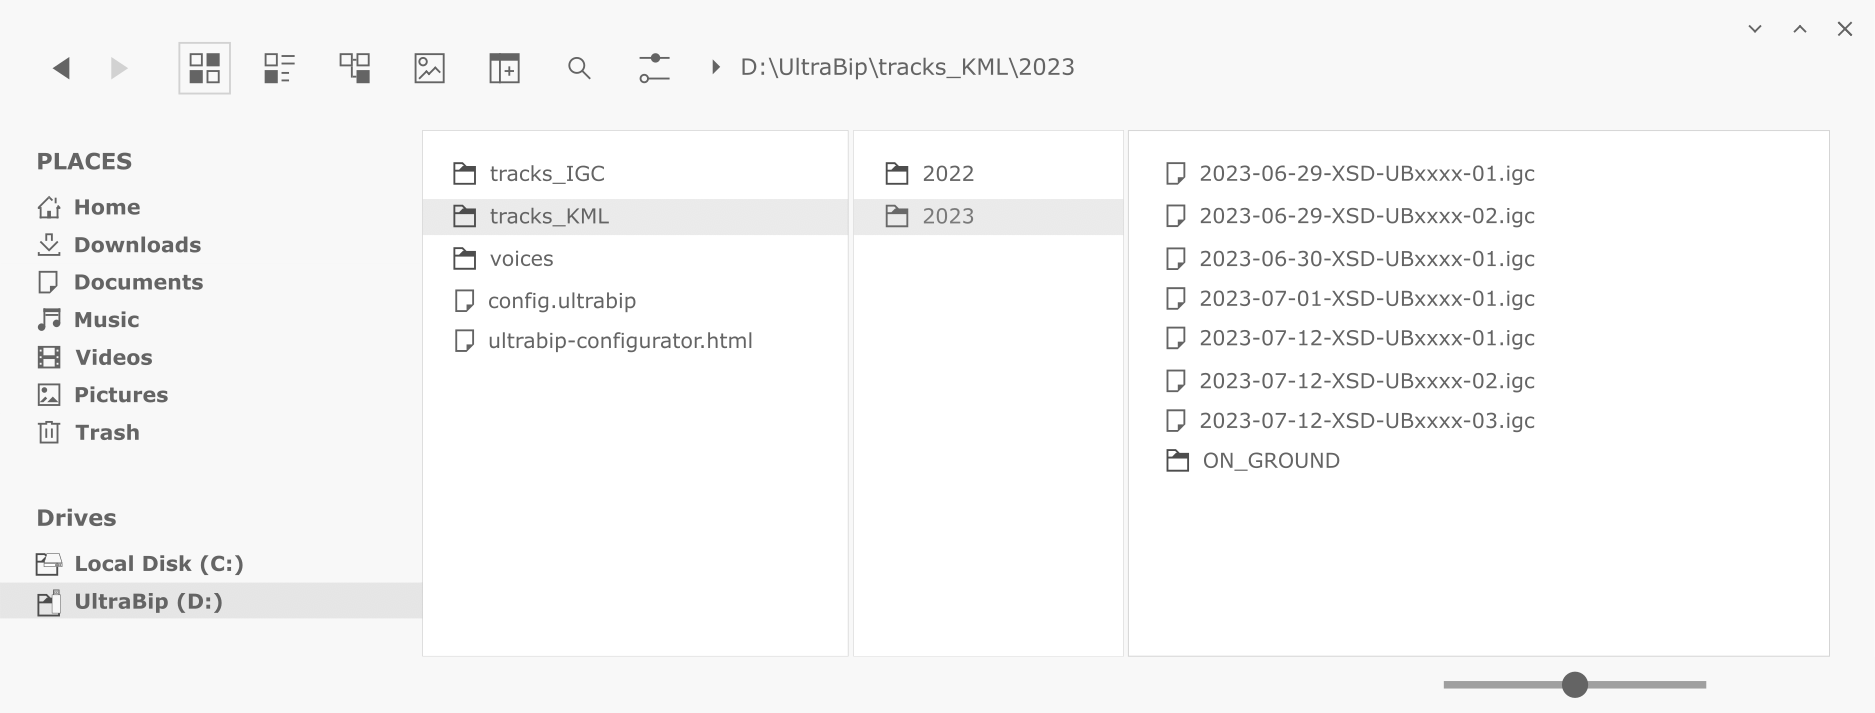
The track files can be deleted if required, as long as the "tracks_IGC" and "tracks_KML" folders remain.
- The firmware version number of your UltraBip can be found in the "Firmware" menu on theBipLink app.
- The version numbers of the voice packs can be found in the "Config" menu on theBipLink app, under the heading "Voice language".